
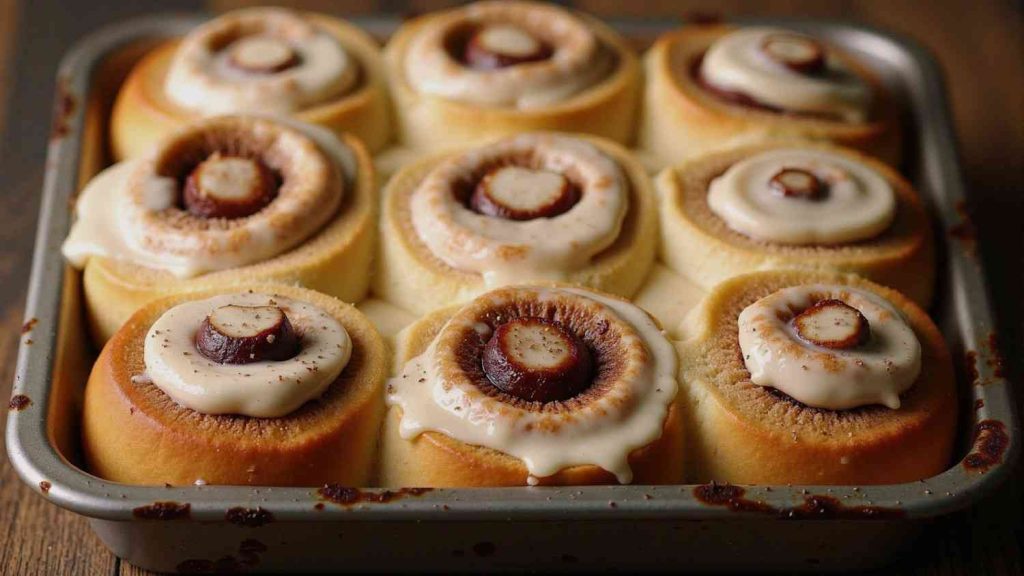

I have made a lot of cinnamon rolls in my life. Classic ones, gluten-free ones, ones baked on a tiny hot plate in a hotel room, and even a batch I once attempted on a camping stove that turned out surprisingly decent. But the day I decided to tuck mashed banana into my homemade cinnamon rolls dough, everything changed. These banana cinnamon rolls are now the recipe my family requests more than anything else I make, and once you try them, I think you will completely understand why.
In this post, I am going to walk you through exactly how I make them, share every trick I have picked up along the way, and explain why the banana is not just a flavor add-on but actually the secret to the most tender, pillowy cinnamon buns you have ever pulled from your oven.
Why I Started Adding Banana to My Cinnamon Rolls
It started, like most of my best recipe experiments, out of necessity. I had two very ripe bananas sitting on my counter, a craving for homemade cinnamon rolls, and absolutely no desire to make two separate things. So I mashed those bananas into my dough, crossed my fingers, and waited.
What came out of the oven was a revelation. The banana added a subtle natural sweetness that meant I could cut back on the sugar. The moisture from the fruit kept the dough incredibly soft, even the next day. And the flavor? It was warm, comforting, and just interesting enough to make people ask what my secret ingredient was. I have since tested this recipe more times than I can count, adjusting the banana ratio, tweaking the filling, and experimenting with the glaze. What I am sharing with you today is the version I keep coming back to every single time
What You Need: Ingredients for Banana Cinnamon Rolls
For the Dough:
| 2 ripe bananas, mashed (the riper the better, seriously) | 3/4 cup warm milk (dairy or oat milk both work great) |
| 2 and 1/4 teaspoons active dry yeast (one standard packet) | 3 tablespoons granulated sugar |
| 1 egg, room temperature | 1/3 cup unsalted butter, melted and slightly cooled |
| 1 teaspoon vanilla extract | 1/2 teaspoon salt |
| 3 and 1/2 cups all-purpose flour (plus more for dusting) |
For the Cinnamon Filling:
| 1/2 cup unsalted butter, softened to room temperature | 3/4 cup packed brown sugar |
| 2 tablespoons ground cinnamon |
For the Cream Cheese Glaze:
| 4 ounces cream cheese, softened | 1 cup powdered sugar, sifted |
| 3 to 4 tablespoons milk | 1/2 teaspoon vanilla extract |
How I Make These Banana Cinnamon Rolls: Step by Step
Step 1: Activate the Yeast
I start by warming my milk to around 110 degrees Fahrenheit. You want it warm to the touch but not hot enough to burn your wrist. I whisk in the sugar and then sprinkle the yeast over the top. I let it sit for about 8 to 10 minutes until it gets foamy and fragrant. If yours does not foam up, your yeast may be old or your milk may have been too hot, and I would recommend starting over with fresh yeast. This one step makes or breaks the whole batch.
Step 2: Mix in the Banana
Once my yeast mixture is foamy, I add the mashed bananas, the melted butter, the egg, and the vanilla extract. I whisk this all together until it is smooth and combined. The mixture will look a little strange at this stage but trust the process. I have stood over that bowl doubting myself many times, and it always comes together beautifully in the end.
Step 3: Build the Dough
I add the salt to my flour, then gradually mix the flour into the wet ingredients. I start with about 3 cups, then add more as needed. The banana adds extra moisture to the dough, so I always end up adding a little more flour than I would in a regular cinnamon roll recipe. The dough should be soft and just slightly tacky but it should not be sticking to everything you touch. I knead it for about 8 minutes by hand (or 5 minutes on a stand mixer with a dough hook) until it is smooth and elastic.
Step 4: First Rise
I place the dough in a lightly oiled bowl, cover it with a clean kitchen towel or plastic wrap, and let it rise in a warm spot for about 1 hour or until it has doubled in size. My favorite trick here is to turn my oven on to the lowest setting for just 2 minutes, then turn it off and put the covered bowl inside. That gentle warmth speeds up the rise beautifully without overheating the dough.
Step 5: Make the Cinnamon Filling
While the dough rises, I beat together the softened butter, brown sugar, and cinnamon until I get a thick, spreadable paste. The key here is that the butter must be genuinely soft at room temperature, not melted. I learned this the hard way: if the butter is too liquid, it runs off the dough when you roll it up and you lose all that gorgeous swirled filling. Properly softened butter stays put and creates those thick, caramelized spirals we all love in homemade cinnamon rolls.
Step 6: Roll, Fill, and Cut
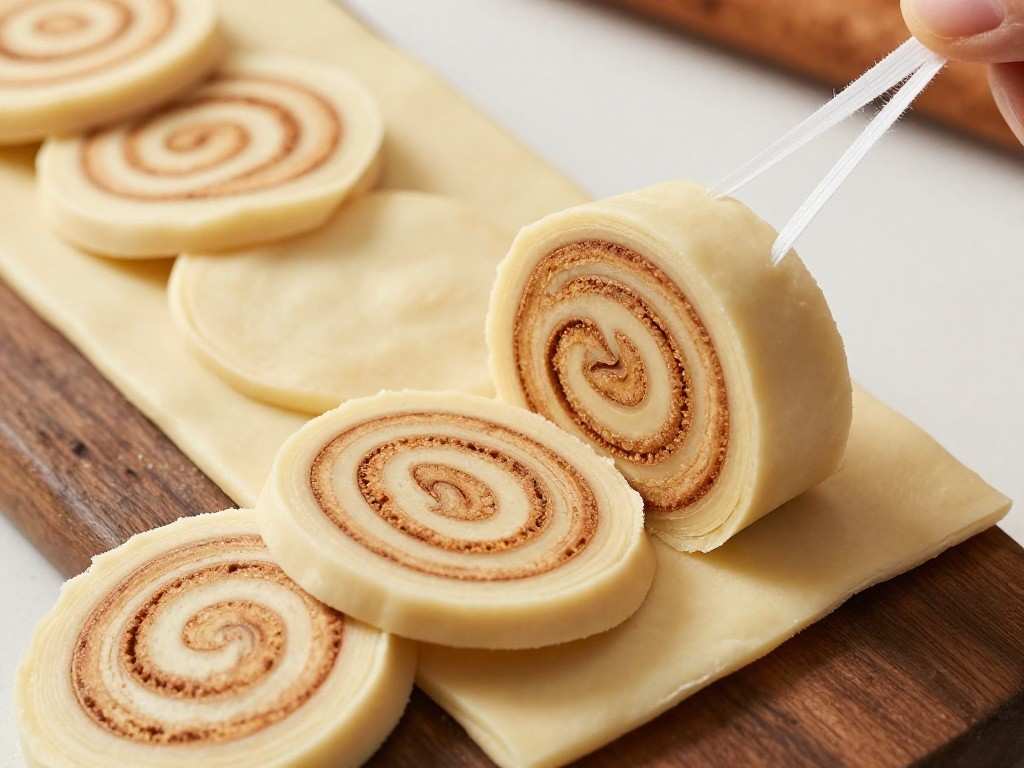
Once the dough has doubled, I punch it down gently and turn it out onto a lightly floured surface. I roll it into a rectangle roughly 16 by 12 inches. I spread the cinnamon filling all the way to the edges, leaving just a tiny border on one of the long sides. Then I roll the dough up tightly, starting from the long side. I use a sharp knife or unflavored dental floss to cut it into 12 even rolls. The dental floss trick was a game changer for me: it slices through the dough so cleanly without squishing the rolls flat the way a dull knife can.
Step 7: Second Rise
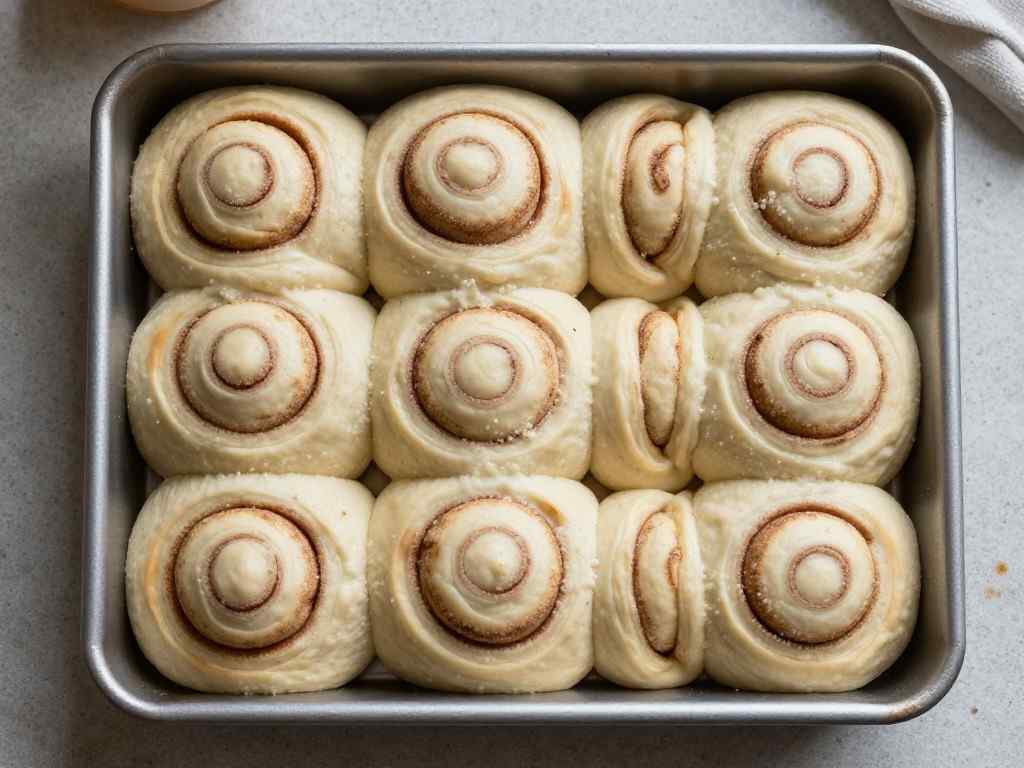
I arrange the rolls in a greased 9 by 13 inch baking pan, leaving a little space between each one. I cover them again and let them rise for another 30 to 45 minutes until they are puffed up and just touching each other. This second rise is where the magic happens. When I first started making cinnamon buns I used to skip it out of impatience and then wonder why my rolls were dense. Now I never rush this step.
Step 8: Bake
I bake the rolls in a preheated oven at 350 degrees Fahrenheit for 22 to 25 minutes. I start checking at 20 minutes. You want the tops to be a golden brown and the centers to be set, not raw and doughy. The smell that fills your kitchen during this step is honestly one of the best things in the world. Warm banana, toasted cinnamon, and buttery dough all mixing together. I always have to stop myself from pulling the pan out too early just because I cannot stand waiting any longer.
Step 9: Make the Glaze and Serve
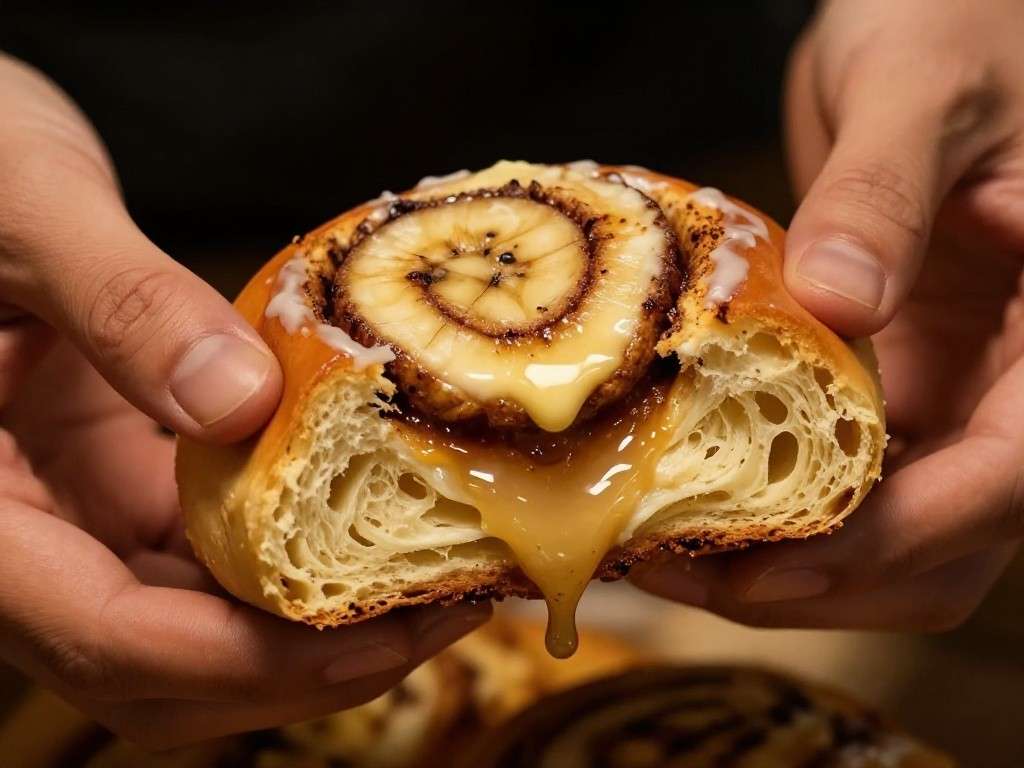
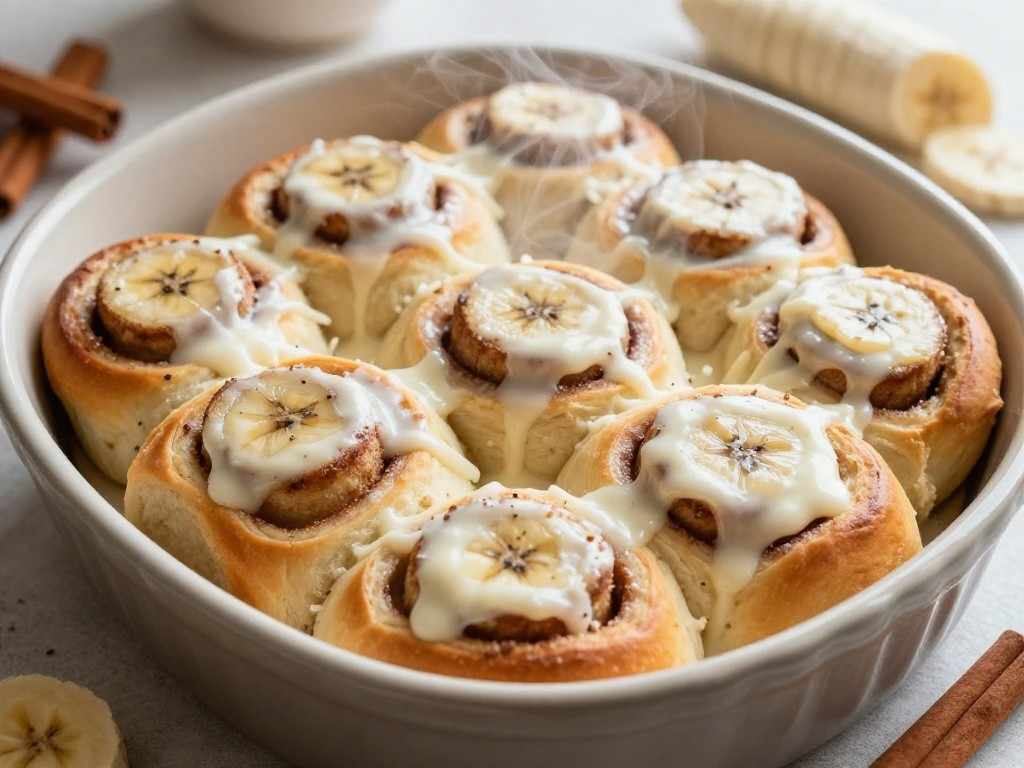
While the rolls are still warm (but not straight from the oven), I whip together the cream cheese glaze. I beat the softened cream cheese until fluffy, then mix in the powdered sugar, vanilla, and milk one tablespoon at a time until I reach a pourable but thick consistency. I pour it generously over the warm rolls and let it melt down into all those beautiful crevices. Serve them immediately if you can. Though honestly, these banana cinnamon rolls are still wonderful the next morning, especially if you warm them up for about 20 seconds in the microwave.
My Top Tips for Perfect Banana Cinnamon Rolls Every Time
- Use very ripe bananas. The browner the peel, the sweeter and more fragrant your rolls will be. Under-ripe bananas do not contribute the same depth of flavor.
- Do not rush the rises. Both the first and second rises are critical for getting that soft, fluffy texture in your homemade cinnamon rolls.
- Room temperature ingredients matter. Cold butter and cold eggs slow down the yeast and make the dough harder to work with. Pull everything out of the fridge about 30 minutes before you start.
- Use floss to cut the rolls. Slide a piece of unflavored dental floss under the roll, cross the ends over the top, and pull. Perfect, clean cuts every time.
- Glaze while warm, not hot. If the rolls are too hot, the glaze melts and slides off completely. Let them cool for about 5 minutes first.
Can You Make These Cinnamon Buns Ahead of Time?
Absolutely, and I actually prefer to make them this way for weekend mornings. After cutting and arranging the rolls in the pan, I cover them tightly with plastic wrap and refrigerate them overnight instead of doing the second rise at room temperature. In the morning, I take them out of the fridge, let them sit on the counter for about 45 minutes to come up to room temperature and finish their rise, then bake as normal.
You can also freeze the fully baked rolls (without glaze) for up to 2 months. I wrap each one individually in plastic wrap and then store them in a zip bag. When I want one, I thaw it overnight and warm it in the microwave or oven, then add fresh glaze. They taste almost as good as the day I baked them.
Variations I Have Tried and Loved
Because I cannot leave well enough alone in the kitchen, I have tried a few different versions of this recipe over the years:
- Banana Walnut Cinnamon Rolls: I sprinkle about half a cup of chopped toasted walnuts over the cinnamon filling before rolling. The nutty crunch against the soft dough is incredible.
- Chocolate Chip Banana Rolls: A handful of mini chocolate chips scattered over the filling takes these into pure dessert territory. My kids go absolutely wild for this version.
- Brown Butter Glaze: I sometimes swap the cream cheese glaze for a simple brown butter and powdered sugar drizzle. It adds a nutty, caramel-like depth that pairs beautifully with the banana.
- Gluten-Free Version: I have successfully made these with a 1:1 gluten-free flour blend. The texture is slightly denser but still wonderfully soft, and the banana helps hold the dough together.
Frequently Asked Questions About Banana Cinnamon Rolls
Can I use frozen bananas for this recipe?
Yes, absolutely! Frozen bananas are actually perfect for this recipe. I thaw them completely at room temperature first and then drain off any excess liquid before mashing. Frozen bananas tend to be even sweeter and softer than fresh ones, which only makes the dough more flavorful.
Why are my cinnamon rolls dense instead of fluffy?
The most common culprit is yeast that did not activate properly. Always check that your milk is warm (around 110 degrees F) and not hot, and make sure your yeast is fresh. Skipping or rushing either of the two rise times is the other main reason rolls turn out dense. Both rises are essential for that soft, pillowy texture in homemade cinnamon rolls.
Can I make these banana cinnamon rolls without a stand mixer?
Completely! I made them by hand for years before I got a stand mixer. Just knead the dough on a lightly floured surface for about 8 minutes until it is smooth and stretchy. It is a bit of a workout but very doable. The dough will tell you when it is ready: it should bounce back slightly when you poke it.
How do I store leftover cinnamon rolls?
I store leftover rolls in an airtight container at room temperature for up to 2 days, or in the fridge for up to 5 days. To reheat, I microwave each roll for about 20 seconds. If reheating several at once, I cover the pan with foil and warm them in a 300 degree F oven for about 10 minutes. I always add a fresh drizzle of glaze after reheating since the original glaze absorbs into the roll overnight.
Can I substitute all-purpose flour with whole wheat flour?
You can replace up to half the flour with whole wheat without significantly changing the texture. Using 100% whole wheat will make the rolls denser and chewier. If you go the whole wheat route, I recommend adding an extra tablespoon or two of warm milk to keep the dough from becoming too stiff.
How many bananas do I need for this recipe?
You need 2 medium to large ripe bananas, which gives you roughly half a cup to two-thirds of a cup of mashed banana. If your bananas are on the smaller side, go ahead and use three. I always go by feel: you want the dough to be soft and lightly banana-scented without being so wet that it will not come together.
Can I make these cinnamon buns dairy-free?
Yes! I have made dairy-free banana cinnamon rolls several times. I swap the regular milk for oat milk or almond milk, use vegan butter in both the dough and the filling, and for the glaze I use dairy-free cream cheese. The results are genuinely delicious and most people cannot tell the difference.
Why is my cinnamon filling leaking out during baking?
This usually happens when the butter in the filling is too soft or slightly melted rather than properly room-temperature softened. The filling needs to be a thick, spreadable paste that stays put when you roll the dough. It can also leak if the rolls are sliced too loosely or the pan is too large. I always use a 9×13 inch pan so the rolls support each other as they bake and hold their shape.
Final Thoughts: Why These Are My Favorite Homemade Cinnamon Rolls
I have baked these banana cinnamon rolls in a full kitchen, a hotel room, and everything in between. What I love most about them is how the banana transforms something that could easily be an ordinary weekend bake into something that feels truly special. The dough is forgiving, the flavor is complex without being complicated, and every single time I pull them out of the oven, the people around me light up. Whether you are a seasoned baker or this is your very first batch of homemade cinnamon rolls, I promise this recipe will work for you. Give it a try, send me a message to let me know how yours turned out, and most importantly: enjoy every single warm, gooey, cinnamon-scented bite.